The workflow
An idea. An agent. A board you can inspect.
In PCB Studio, ADE means Agent Development Environment: the place where your electronics brief, the AI’s work and the project artifacts stay connected.
- Start with
- A design brief
- Follow
- Project artifacts
- Decide through
- Review
1. Describe the board before choosing every part
Begin with what the board should do and the constraints that matter. Include its intended connections, controls, physical size and power source where you know them. Separate requirements from ideas you are willing to change. A clearer brief gives you something concrete against which to review the proposed design.
For an OrbitX-like project, an illustrative starting brief is: “Develop a USB-C desktop controller with a round display, a rotary control and four keys. Target a 100 × 80 mm board. First propose the architecture and list the assumptions I need to confirm before selecting components.” This is a starting prompt, not a promise of a completed or validated board.
2. Review the proposed direction
Use the conversation to clarify the design before moving further. Check that the proposed blocks correspond to the behavior you requested. Ask which choices are fixed, which depend on a datasheet and which are still assumptions. When a requirement changes, describe that change explicitly so it can be reflected in the project.
Keep the scope of the next step understandable. Reviewing a power-input decision or a connector choice is easier when you can see the question being answered and the evidence behind it.
3. Follow the artifacts as they develop
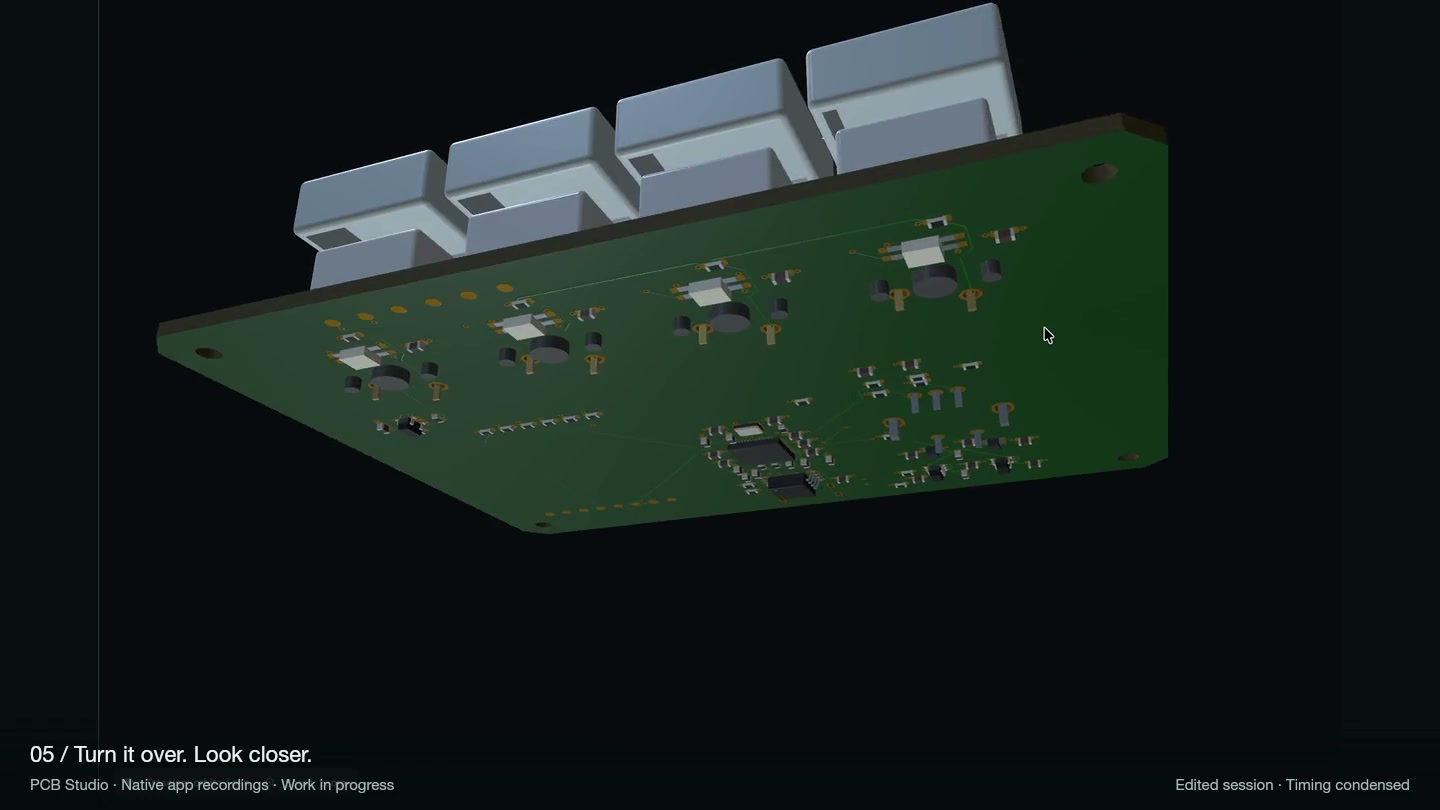
The useful result of the conversation is a project you can open and examine. Move between the schematic, component list, PCB and 3D views to see how the current design is represented. If a part looks wrong in 3D, inspect its model and placement; if a connection is wrong, return to the electrical information.
Ask ADE to explain the current state rather than relying on a general “finished” message. Which artifacts changed? What checks were actually run? What is unresolved? These questions help you distinguish progress in the design from a result that has been verified.
4. Review the result at the right level
These are review questions, not a claim that the software has automatically completed every check. AI-generated output and a successful visualization both need engineering judgment before fabrication.
- Requirements: does the proposed design still match the intended board?
- Components: do selected parts, pin assignments and footprints match their documented use?
- Layout: are placement and copper ready for the next design check?
- Mechanical details: are models oriented and seated correctly on both sides?
- Release: which electrical, mechanical and manufacturing checks remain open?
See the workflow in a real project
The OrbitX walkthrough moves from a new project and an idea description to ADE at work and a 3D board inspection. It uses recordings of the native app with condensed timing. The separate assembly experience lets you examine the physical arrangement at your own pace.
PCB Studio remains in active development. Early access is designed around small groups and feedback on real projects, including the steps that fail or need clarification. A specific report about an artifact or a reproducible action is especially useful when improving the tool.
Explore the OrbitX project